Self host Embedbase on Render.com
Creating Render Account
To host on Render, you'll need to sign up or create an account (opens in a new tab). It's free and supports direct login using google, GitHub and GitLab account. Or you can use email and password to signup. You need to verify your email to get full access to the platform. Just head to render/register.
Need for GitHub or GitLab account
It's easier to deploy an application that has its source code hosted on GitHub or GitLab. Render connects with GitHub or GitLab to deploy your apps and websites automatically on every push to your project. This is very useful, as you don't have to manually deploy every time you make a change. You can either connect GitHub or GitLab or both.
Setting up environment
You'll need to download and install Python3 to your local machine. It's better to set up a virtual environment for the application.
Next, create a folder in your preferred directory and name simple-embedbase. Next to set up virtual environment enter the command opening terminal or CMD.
Next to set up virtual environment, on Linux sometimes we need to install extra library. To do the same, just enter the command in your terminal.
sudo apt-get install python3-venvNext, to initialize and activate a virtual environment on Mac and Linux, use the commands below.
python3 -m env env
source env/bin/activate
Installing requirements
Make sure your package manager that is pip is up-to-date.
python -m pip install --upgrade pipWe're going to use OpenAI to create embeddings and Supabase as a database.
So you'll need now to install Embedbase, OpenAI, and Supabase, using pip:
pip install embedbase openai supabaseEmbedbase also requires an ASGI server, for production, such as Uvicorn or Hypercorn.
Make sure to have sat up Supabase for Embedbase to work. You can find the instructions here (opens in a new tab).
Coding the API
Open the folder in any text editors, you can use notepad or advanced IDE's like VS Code or Sublime Text 4. Make a new file called main.py and we use this file to write the code in.
Just copy and paste the below lines to the file. If you're good with python or professional, then you can add or modify, making the API better.
import os
import uvicorn
from embedbase import get_app

from embedbase.database.supabase_db import Supabase
from embedbase.embedding.openai import OpenAI


app = (
    get_app()
    .use_embedder(OpenAI(os.getenv("OPENAI_API_KEY")))
    .use_db(Supabase(os.getenv("SUPABASE_URL"), os.getenv("SUPABASE_KEY")))
).run()

if __name__ == "__main__":
    uvicorn.run("main:app")
Save the file.
Let's grab these keys now!
Getting OpenAI API Key
To get the OpenAI API key, you'll need to create an account on OpenAI. It's free and you can get a key by creating an account. Just head to https://openai.com/ (opens in a new tab) and click on the button Get Started.
Head there (opens in a new tab) to get your API key.
Getting Supabase API Key
To get the Supabase API key, you'll need to create an account on Supabase. It's free and you can get a key by creating an account. Just head to https://supabase.com/ (opens in a new tab) and click on the button Get Started.
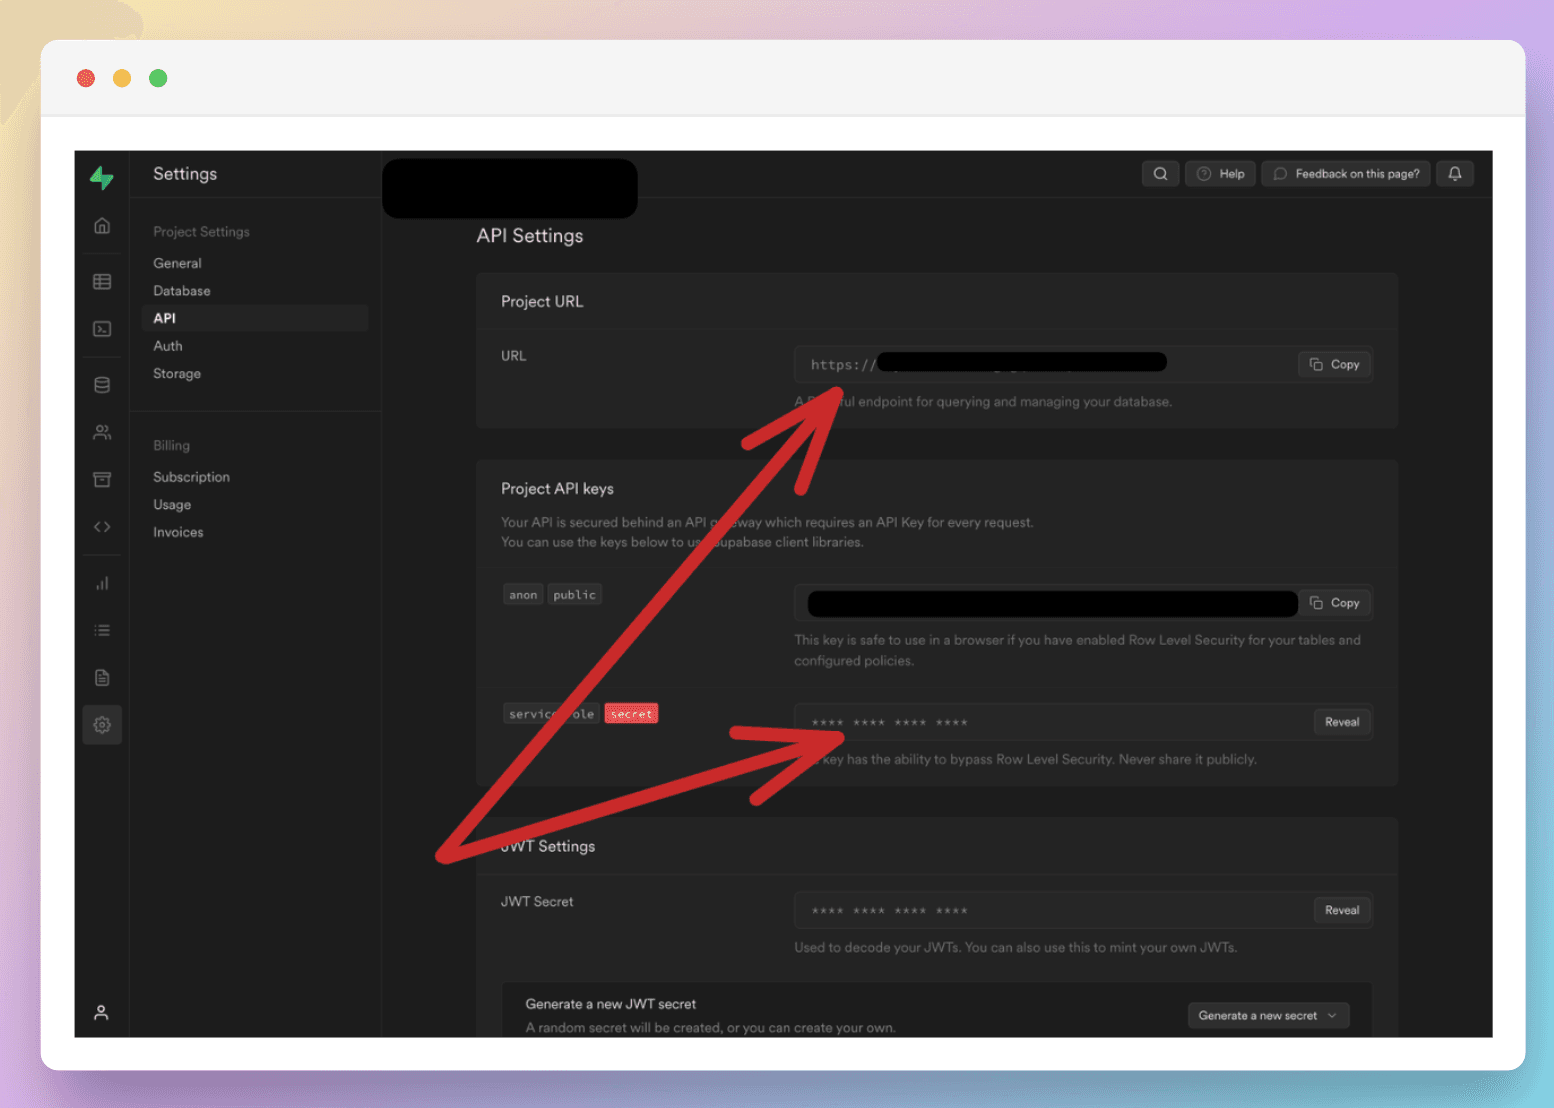
Now open settings:

And copy the URL and API key.
Now we have all the keys, let's add them to the environment variables.
export OPENAI_API_KEY="sk-..."
export SUPABASE_URL="https://..."
export SUPABASE_KEY="..."
Let's try out the code using the command:
python3 main.pyIt should run without any errors.
All done. Now we just need to create some extra files which are need by Render to identify it as a python application.
Creating Requirements.txt
You can simply type git+https://github.com/different-ai/embedbase, supabase and openai in the requirements.txt file. When deploying, render will install the latest version of these modules.
git+https://github.com/different-ai/embedbase
supabase
openai
(Note that we use the latest Embedbase version from GitHub, due to some issues with Render and PyPi)
Creating a .gitignore file
.gitignore file helps to avoid uploading of unwanted or private files to the git clients such as GitHub or GitLab. When sharing your code with others, there are often files or parts of your project, you do not want to share. So these files or folders can be mentioned in the .gitignore file.
For this simple-embedbase we don't want to upload env and pycache to the GitHub. So we mention them in the .gitignore file like this.
env
__pycache__
Upload to GitHub or GitLab
We're using GitHub here, but you can use GitLab as well. I have installed git, and I have connected it to my GitHub account. You'll find many articles on how to do it, just google it. If you're using Visual Studio then it has in built GitHub plugin which makes it way easier.
Deploying to Render.com
As we are not deploying a static site, we should choose the option Web Service.
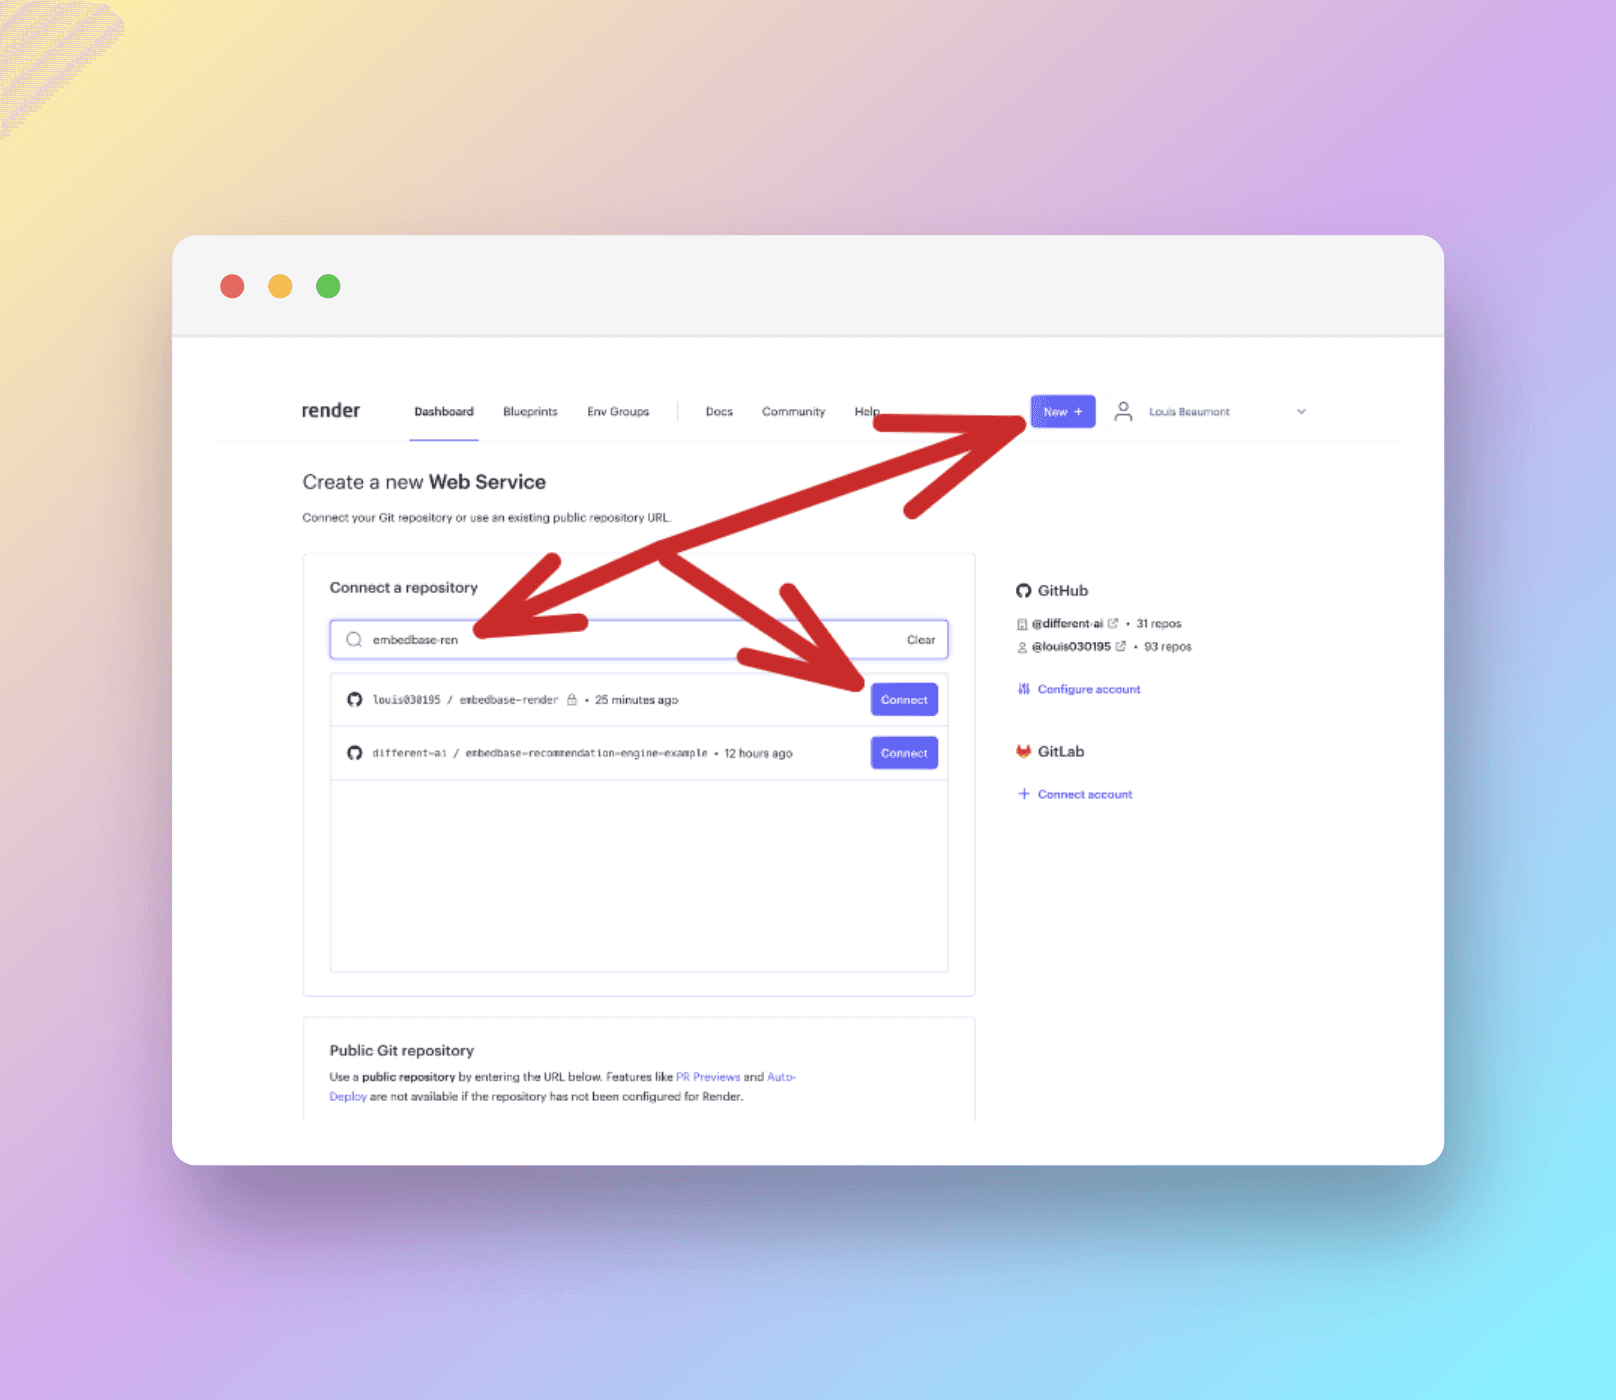
If you have connected your GitHub account, then you can just search the repository name and find it there.
Give a name to your web-service, then to select the region which is nearest to you. Leave all other values default. For the Start command, copy and paste the below:
python3 main.pyYou need to add your keys and other environment variables like so:
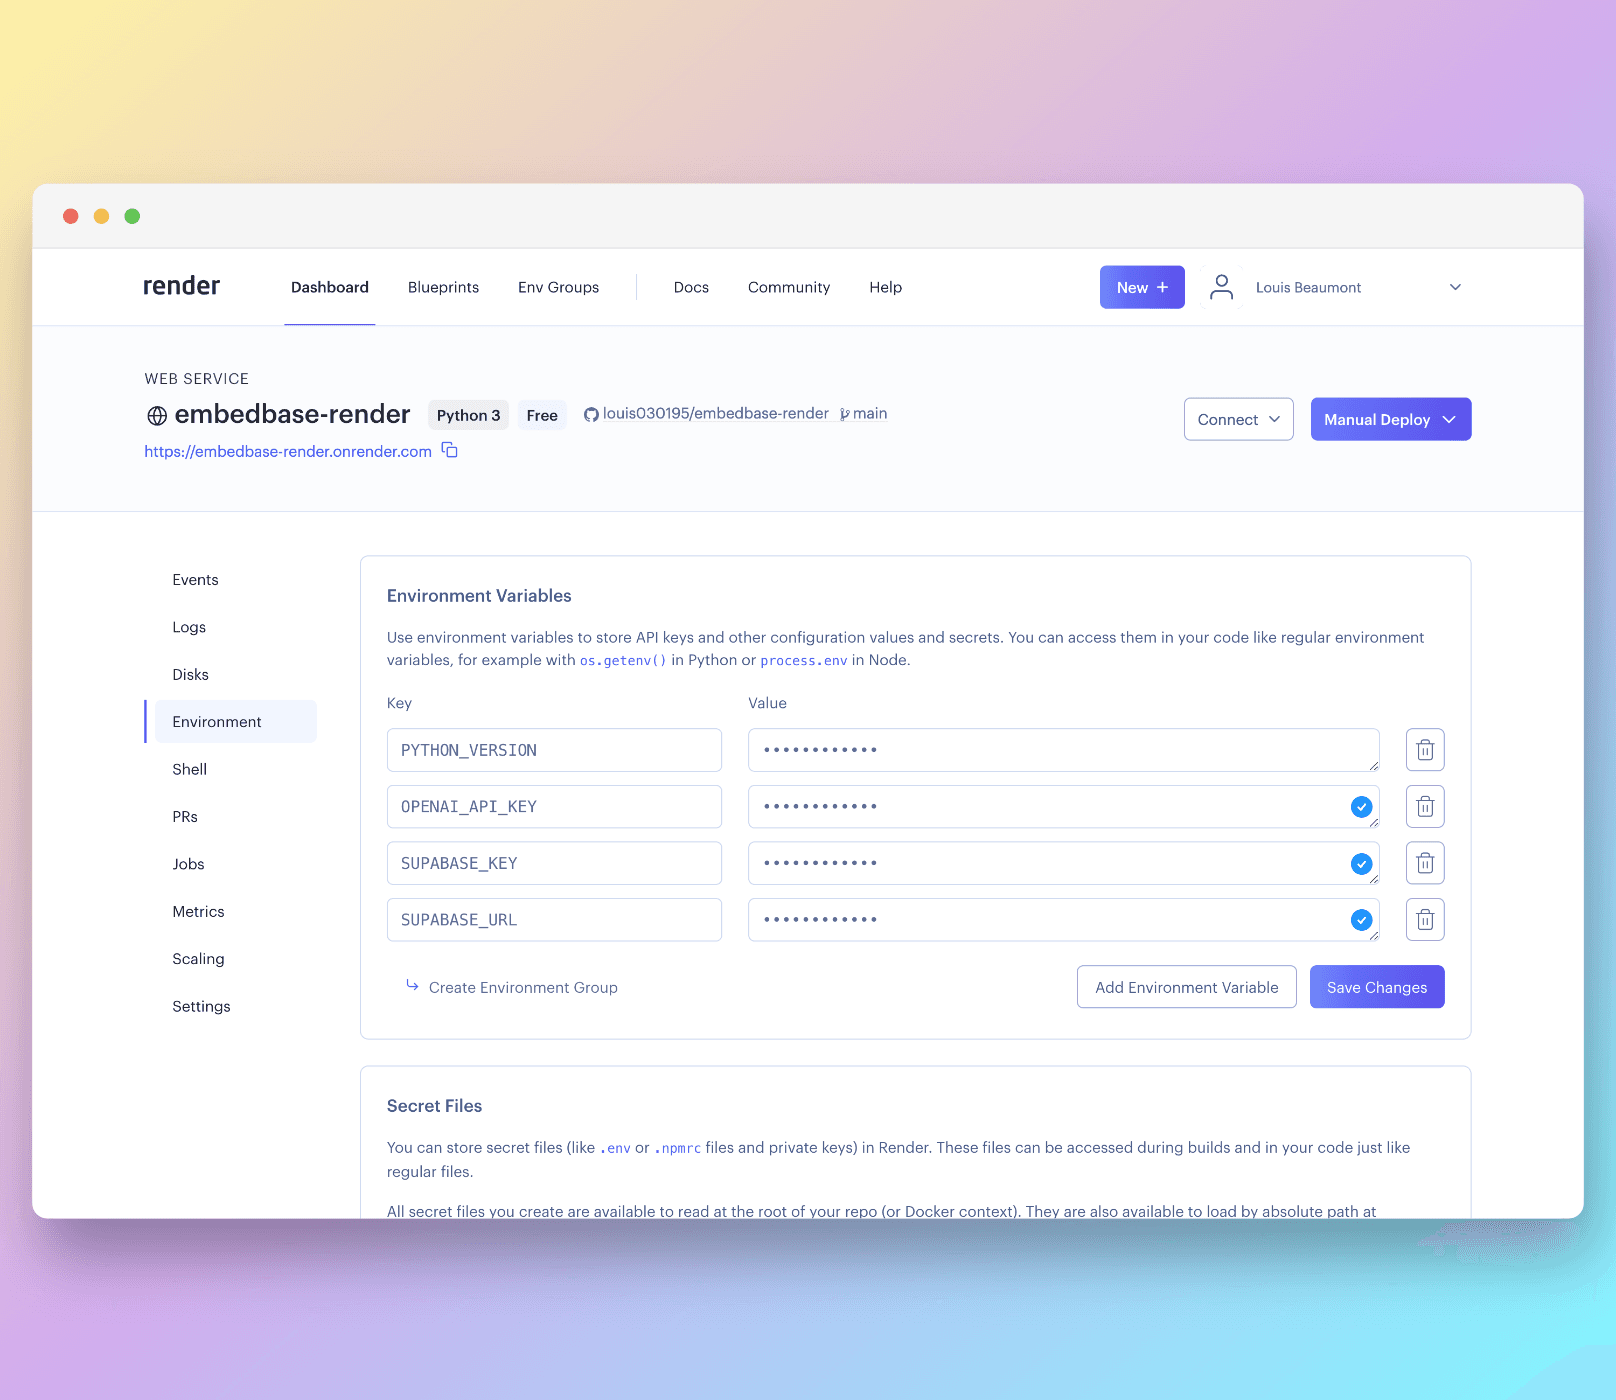
Make sure to add PYTHON_VERSION to at least 3.8.0 as Embedbase requires Python 3.8 or higher.
Deploying may take some time, so patiently wait. After successful deployment, you should see the message like this below.
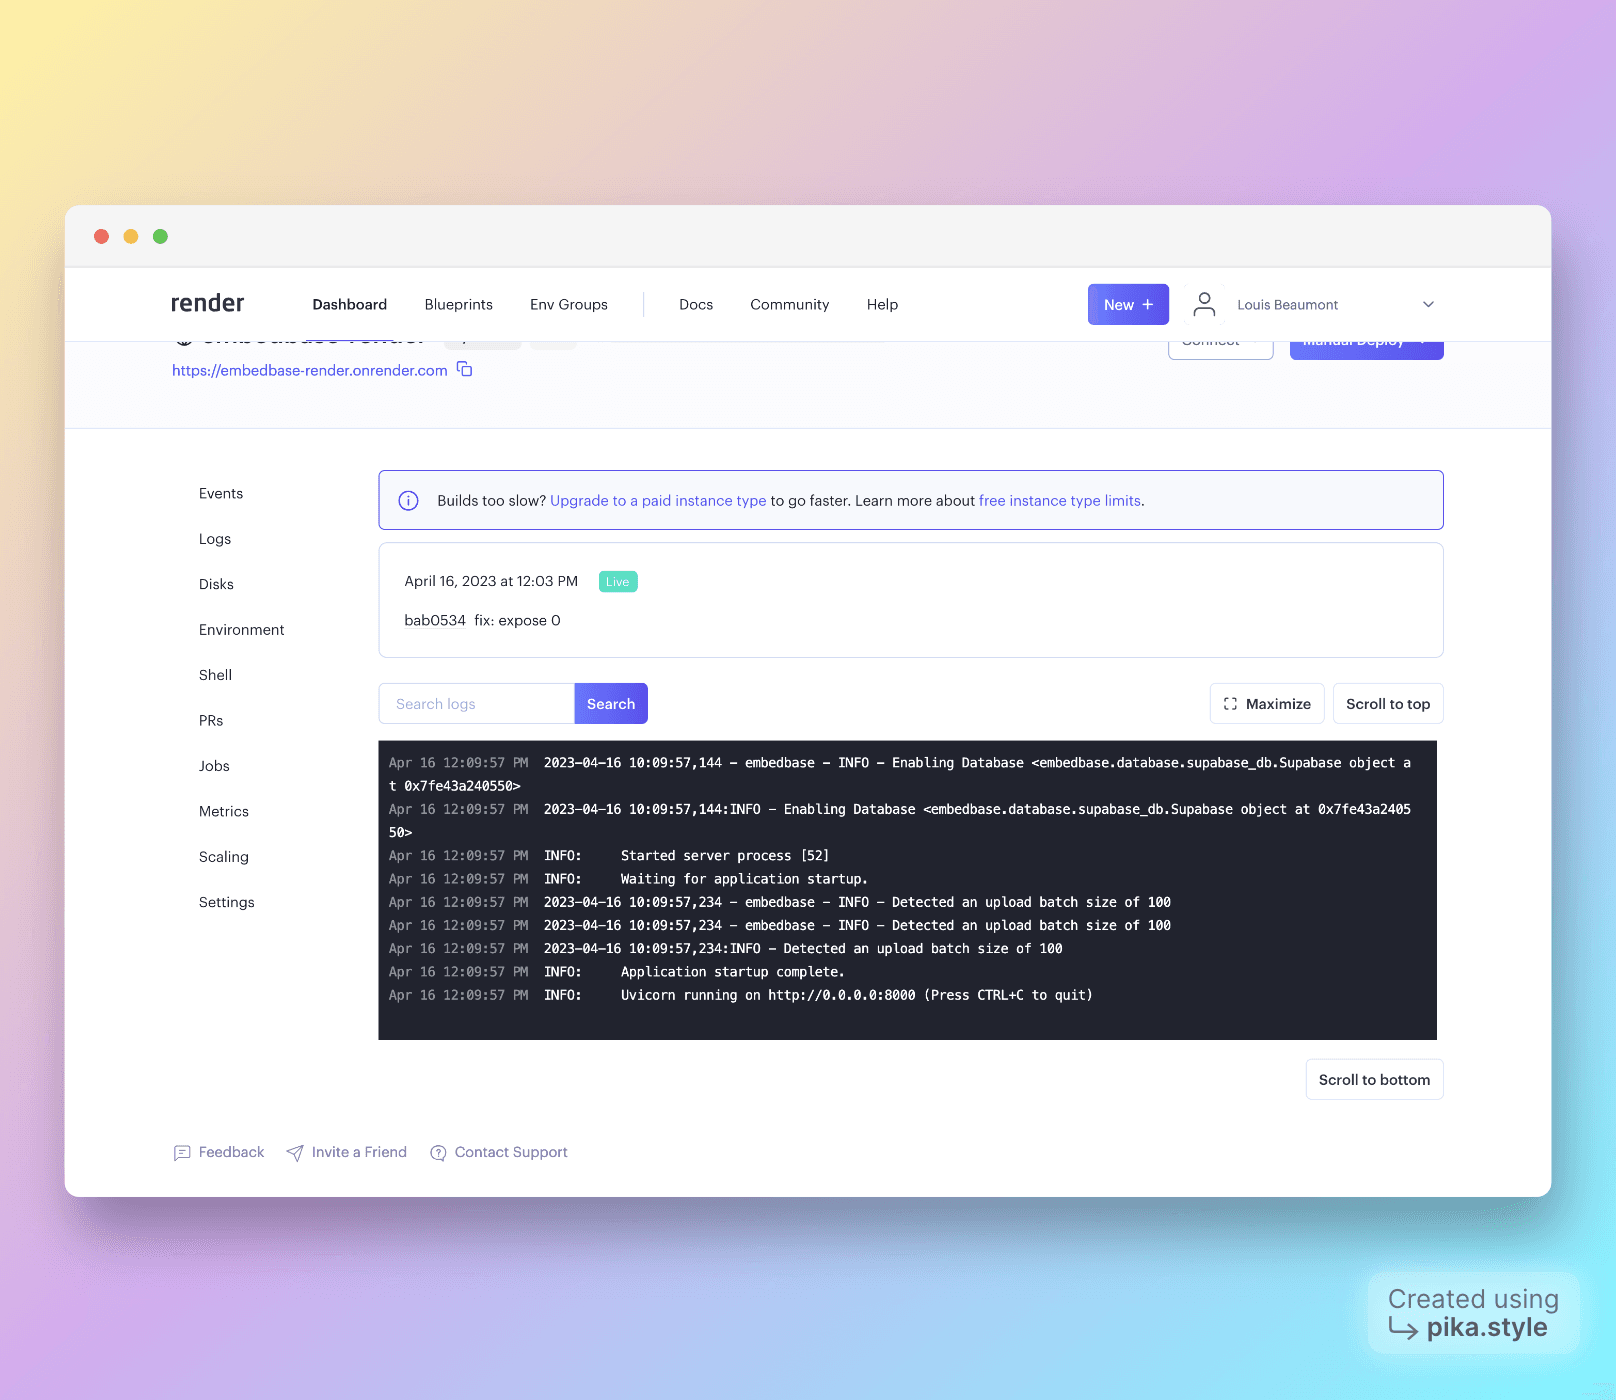
Try to add some content to the Embedbase instance.
TypeScript
import { createClient } from 'embedbase-js'
const url = "http://<your-render-url>"
const embedbase = createClient(url)
const SENTENCES = [
    "The lion is the king of the savannah.",
    "The chimpanzee is a great ape.",
    "The elephant is the largest land animal.",
];
const DATASET_ID = "animals"
const add = async () => {
    const data = await embedbase
        .dataset(DATASET_ID)
        .batchAdd(SENTENCES.map((data) => ({ data })))
    console.log(data)
}
add()
You should get a similar response:
{
  "results": [
        {
            "data": "The lion is the king of the savannah.",
            "embedding": [...],
            "hash": ...,
            "metadata": null
        },
        {
            "data": "The chimpanzee is a great ape.",
            "embedding": [...],
            "hash": ...,
            "metadata": null
        },
        {
            "data": "The elephant is the largest land animal.",
            "embedding": [...],
            "hash": ...,
            "metadata": null
        }
    ]
}
Let's try to search now
TypeScript
const search = async () => {
    const data = await embedbase
        .dataset(DATASET_ID)
        .search("Animal that lives in the savannah", { limit: 1})
    console.log(data)
}
search()
You should get a similar response:
"The lion is the king of the savannah."
Congratulations, you have successfully deployed your Embedbase instance to the render platform.
Summary
It was so simple to deploy an Embedbase instance to render 🚀.